10 Great Tips for Keeping Your Airtable Base Clean and Organized
Airtable is a fantastic tool for organizing virtually anything—from project plans to inventories. But as your projects grow, so does the complexity of your bases. Here are ten expert tips to keep your Airtable bases clean, organized, and running smoothly.
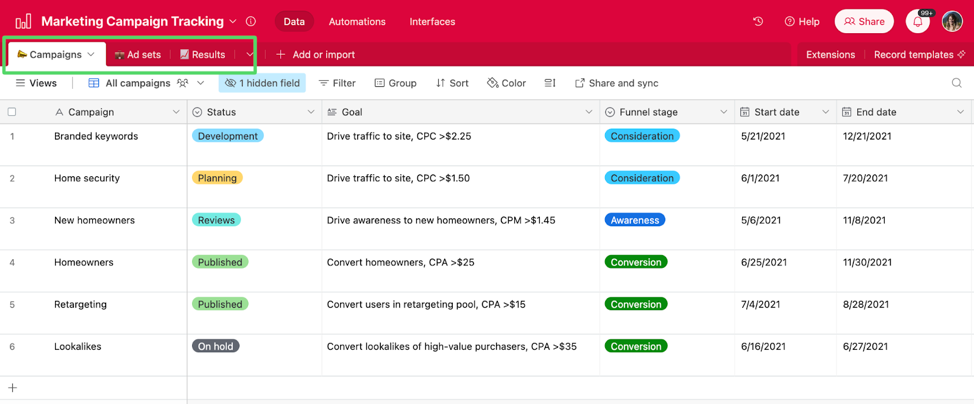
1. Name Your Tables Deliberately
Give your tables descriptive and meaningful names that clearly reflect their purpose. It’s much easier to locate the “Marketing Campaigns” table than “Table 1.” Consistent, clear naming makes collaboration smoother and reduces the chance of errors. You can use emojis in your table names which further helps in distinguishing tables at a glance. This visual cue can help you and your team quickly identify and navigate to the correct table, saving time and reducing confusion.
2. Schedule Regular Clean-Up Time
Set aside time regularly—perhaps weekly or monthly—to go through your base and clean up outdated or unnecessary records. Treat this time like an appointment in your calendar, making it a non-negotiable part of your routine. Consistent maintenance prevents your base from becoming cluttered and unwieldy over time, ensuring that your Airtable remains a reliable and effective tool.
3. Use Sections for Structured Views
Organize the views in your into sections based on their function or department. This neatens up your sidebar and helps you segregate views logically. Categorizing views in this manner makes it much quicker to find the view you need when you need it, promoting efficiency, especially when working with extensive data.

4. Leverage Single Select Fields
Use Single Select fields for statuses, categories, and other non-variable data whenever possible. This maintains consistency across your records and ensures data integrity. By using Single Select fields, you’re setting a clear structure that streamlines data entry and makes your base easier to analyze and report on.
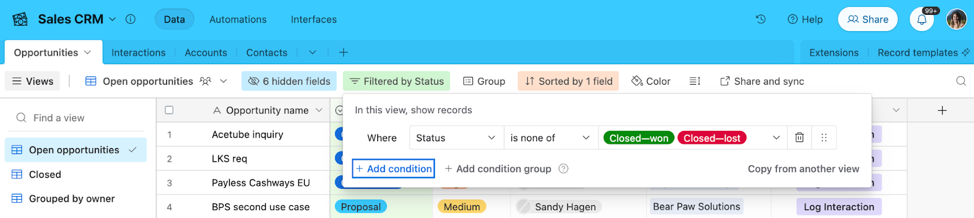
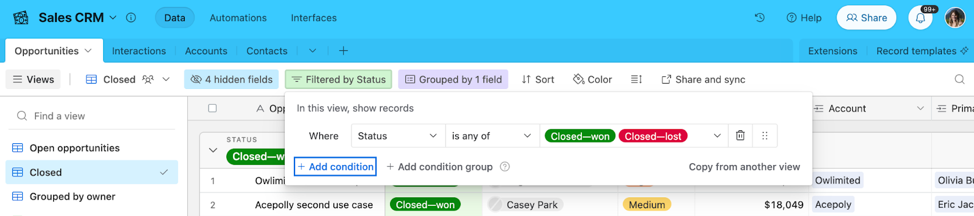
5. Organize Historic Records with Filters
Instead of deleting old or completed records, consider archiving them by filtering these records out of your active views. Archiving helps to remove clutter f while preserving the data for future reference. You may consider creating specific views for archived records such as “Completed Projects”. This ensures that important information is never lost, creating a valuable resource for historical data without cluttering your main workspace.
6. Leverage Airtable Formulas
Take advantage of Airtable’s formula fields to automate calculations, and to perform data consistency checks. This not only reduces manual errors but also significantly speeds up your workflow. Use formula fields to automatically calculate dates, totals, or status updates, saving time and ensuring that your data remains clean and accurate.
7. Establish Clear Naming Conventions
Decide on a set naming convention for the primary field of all records and stick to it. It is crucial this name is unique to each record for data integrity. Having a consistent naming strategy, such as “Client: Order #”,” simplifies searching for specific records. It is recommended to use a Formula as the primary field to ensure the convention is always followed. This discipline in naming makes sorting your data effectively and efficiently a breeze, helping your team stay on the same page.

8. Consider Assigning Ownership to Important Fields
Make sure that every relevant record has an ‘Owner’ or ‘Assigned to’ field. Examples of the types of records where ownership fields are useful include projects, clients, or leads. This clarity reduces duplication of effort and holds everyone accountable for their tasks. Clearly assigned responsibilities create transparency within your team, making it easier to track progress and identify bottlenecks.
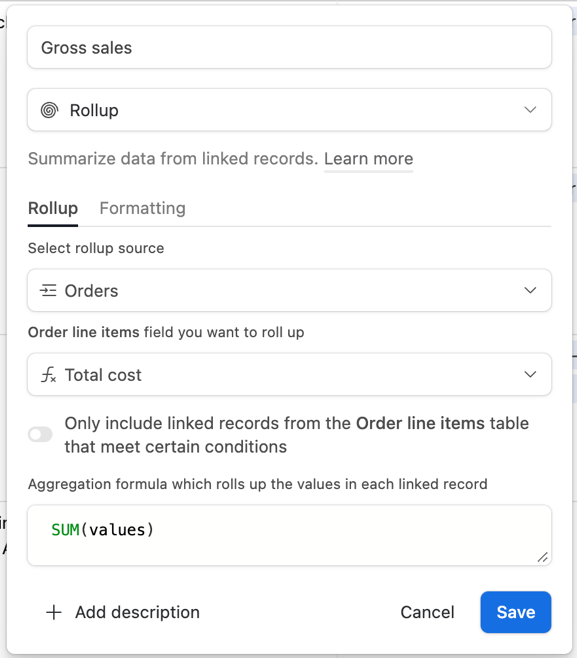
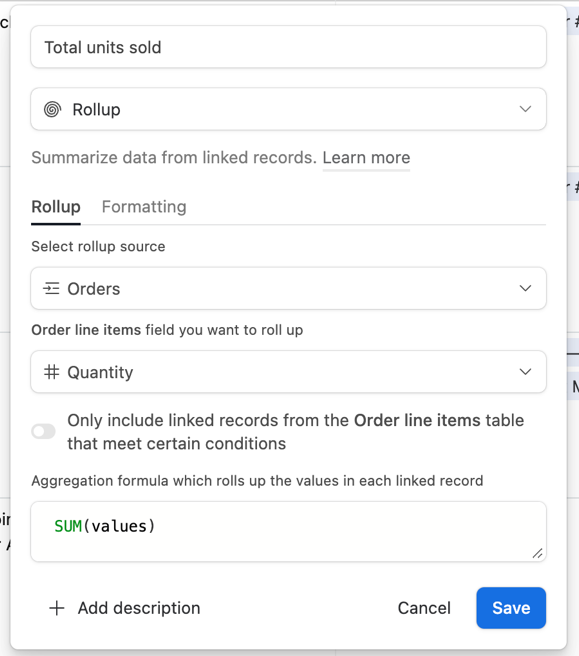
9. Keep a ‘Master’ Table
For complex bases with multiple related tables, consider maintaining a ‘Master’ table that summarizes key information from other tables via lookup and rollup fields. This centralizes important data in one place, giving you a high-level view of your data without sifting through multiple tables. Creating a ‘Master’ table also facilitates advanced reporting and analytics by aggregating critical data in one comprehensive, easy-to-access location.
10. Use Templates for Repeated Processes
If you have processes that are repeated for different projects or clients, set up templates in Airtable. This ensures that each new iteration is organized and structured correctly from the start. Using templates standardizes your procedures, saving you time on setup and maintaining consistency across projects, which is invaluable for scalability and team collaboration.
Conclusion
Keeping your Airtable bases clean and organized doesn’t have to be a chore. With these 10 tips, you can maintain a tidy, efficient workspace that makes finding what you need a breeze. Remember, the key is consistency—set standards early, and make organization a regular part of your Airtable routine.